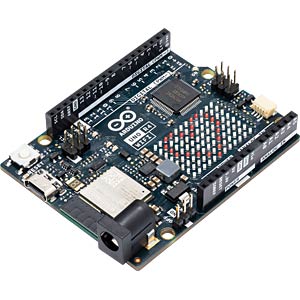
I was wondering how to use the timers in the new Arduino UNO R4. Unfortunately I did not find any documentation, so I decided to document my findings here.

The UNO R4 has two timer peripherals: the General PWM Timer (GPT) and the Asynchronous General Purpose Timer (AGT).
There are only 2 16 bit AGT timers (but one is already used to provide the Arduino millis() and microseconds() methods) and there are 7 GPT timers which are also used by PWM. To increase the flexibility you can explicitly request a timer which has been reserved for PWM.
The Arduino API implements the FspTimer class which provides all the necessary functionality.
Here is a test sketch that is setting up a GPT timer with a corresponding interrupt which executes a callback method at a defined interval rate e.g. 8000 hz.
#include "FspTimer.h"

FspTimer audio_timer;
uint64_t count=0;
uint64_t start_time=0;

// callback method used by timer
void timer_callback(timer_callback_args_t __attribute((unused)) *p_args) {
  count++;
}

bool beginTimer(float rate) {
  uint8_t timer_type = GPT_TIMER;
  int8_t tindex = FspTimer::get_available_timer(timer_type);
  if (tindex < 0){
    tindex = FspTimer::get_available_timer(timer_type, true);
  }
  if (tindex < 0){
    return false;
  }

  FspTimer::force_use_of_pwm_reserved_timer();

  if(!audio_timer.begin(TIMER_MODE_PERIODIC, timer_type, tindex, rate, 0.0f, timer_callback)){
    return false;
  }

  if (!audio_timer.setup_overflow_irq()){
    return false;
  }

  if (!audio_timer.open()){
    return false;
  }

  if (!audio_timer.start()){
    return false;
  }
  return true;
}

void setup() {
  Serial.begin(115200);
  beginTimer(8000);
  start_time = millis();
}

void loop() {
  // calculate the effective frequency
  int freq = 1000 * count / (millis()-start_time);
  Serial.println(freq);
  count = 0;
  start_time = millis();
  delay(1000);
}
This is pretty straight forward!
The cool thing, which is no shown here, is that you can add a final parameter to the audio_timer.begin() method which will end up as parameter value which is passed to the timer_callback!


9 Comments
Richard · 24. December 2025 at 17:04
Me again! I added some I/O to your sketch, & it runs my display. Timer set for 200hz (no flicker).
I modofied the timer_callback routine:
// callback method used by timer
void timer_callback(timer_callback_args_t __attribute((unused)) * p_args) {
count++;
noInterrupts();
seven_seg(); //select next digit
interrupts();
}
Very happy now!
Best wishes for 2026!
Richard · 24. December 2025 at 14:58
Hi Phil. Following on from my previous post:
First steps OK: serial shows 99 (+/-100Hz), which is what I want.
How do I get timer_callback (ISR?) to do something useful?
I tried adding a couple of lines to show the count progress, but the sketch just hangs.
I guess the interrupt handler is messing with the Serial monitor.
Next, I will add some code to drive the display. Maybe that will work.
Richard · 24. December 2025 at 14:23
Hi from Belgium. Like you, I could not find any info concerning timer interrupts for the Uno R4.
I loaded your sketch, & it ran immediately! (This is unique! Normally, there is some tailoring to do, but not this time!)
Now I have to tune your sketch to get a 100Hz interrupt (multiplexing for a 4-digit 7-segment display).
Regards,
RWK
han · 22. May 2024 at 15:55
hello. My name is Seungmin Han. I want to control a BLDC motor. The frequency starts at 1666hz. But Arduino R4 cannot control the motor. Maybe it’s my fault. Because I am a beginner. So I want control MCU register control. help me!!
pschatzmann · 22. May 2024 at 17:13
I never tried this but Google gives the following information: The frame rate of these pulses is usually between 50Hz to 490Hz
So you seem to be much too high. The speed is controlled by setting the duty cycle
Anonymous · 6. November 2023 at 21:25
Thank you for this information. Very helpful.
ArminJo · 26. July 2023 at 22:18
Hi Phil,
thanks for the code, but it is somehow incorrect, especially
if (tindex==0){
and
tindex = FspTimer::get_available_timer(timer_type);
at least for the 1.02 version of the FspTimer library
A correct version (with different variable names) should be:
uint8_t tTimerType = GPT_TIMER;

int8_t tIndex = FspTimer::get_available_timer(tTimerType); // Get first unused channel. Here we need the address of tTimerType

if (tIndex < 0 || tTimerType != GPT_TIMER){

    // here we found no unused GPT channel

    tIndex = FspTimer::get_available_timer(tTimerType, true); // true to force use of already used PWM channel

  // If we already get an tIndex < 0 we have an error, but do not know how to handle :-(

  FspTimer::force_use_of_pwm_reserved_timer(); // enable usage of channel for use in begin()

}
…
it is used here: https://github.com/Arduino-IRremote/Arduino-IRremote/blob/master/src/private/IRTimer.hpp#L1110
pschatzmann · 26. July 2023 at 22:59
Thanks for your feed-back
Doug · 3. July 2023 at 20:09
Thanks a lot for this posting. I just got an UNO r4, and quickly realized I had no idea how to implement a times ISR. Could find anything anywhere, and then saw this. Thanks again!!