Arduino AudioKit HAL
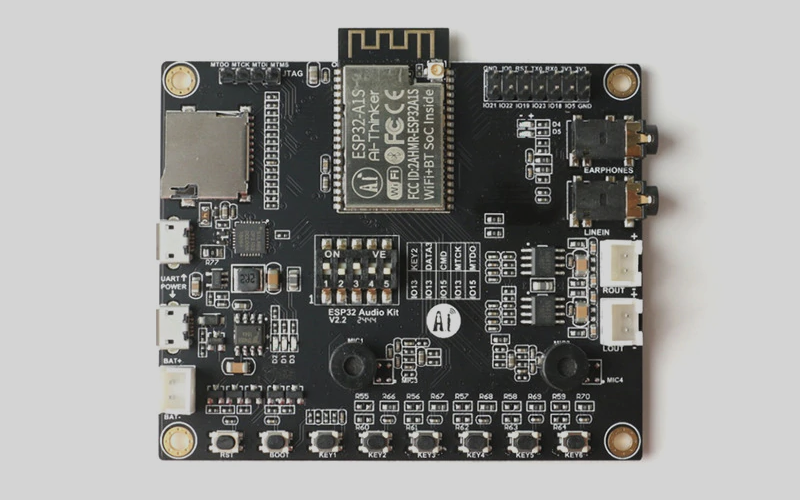
As you might know from my last posts I am currently extending my Arduino Audio Tools library to support the AI Thinker Audio Kit which is based on the ES8388 audio chip.
.
There are different ESP32 AudioKit boards available that can be programmed with the Espressif ADF Framework.

The ADF Framework contains an abstraction layer to support different CODEC chips. Unfortunately ADF can not be used in Arduino, but it would be quite useful to have this functionality also available.
Because I wanted to have a proper support of the AudioKit for my Arduino Audio Tools library and since my Audio Tools are header only, I decided to provide this functionality in a separate project.
I converted the audio_boards and their related drivers into an Arduino Library and provide an easy to use C++ class which configures both the CODEC and I2S. I also tried to abstract away all ESP32 specific funcationality.
So with this project it should now get quite easy to use these boards also in Arduino.
Configuration
You can define your board and the default settings in the AudioKitSettings.h file.
 * @brief AUDIOKIT_BOARD selects a specic board:
 * 1) lyrat_v4_3
 * 2) lyrat_v4_2
 * 3) lyrat_mini_v1_1
 * 4) esp32_s2_kaluga_1_v1_2
 * 5) ai_thinker_v2_2
 */

#define AUDIOKIT_BOARD 1
Here the lyrat v3.4 has been selected.
Example Output Sketch
Here is an example sketch that writes audio data to the audio kit board via I2S. By default I2S is set up as master and the codec as slave, the sample size is 16 bits and the sample rate is 44.1k/sec – if you did not change the default settings.
You can adjust these parameters by setting your requested values in the cfg below:
#include "AudioKit.h"
#include "SineWaveGenerator.h"

AudioKit kit;
SineWaveGenerator wave;
const int BUFFER_SIZE = 1024;
uint8_t buffer[BUFFER_SIZE];

void setup() {
  // open in write mode
  auto cfg = kit.defaultConfig(true);
  cfg.sample_rate = AUDIO_HAL_22K_SAMPLES;
  kit.begin(cfg);

  // 1000 hz
  wave.setFrequency(1000);
  wave.setSampleRate(cfg.sampleRate());
}

void loop() {
  size_t l = wave.read(buffer, BUFFER_SIZE);
  kit.write(buffer, l);
}
Example Audio Input Sketch
We can also read the audio input from the microphones:
#include "AudioKit.h"

AudioKit kit;
const int BUFFER_SIZE = 1024;
uint8_t buffer[BUFFER_SIZE];

void printBuffer(int len){
  // by default we get int16_t values on 2 channels = 4 bytes per frame
  int16_t *value_ptr = (int16_t*) buffer;
  for (int j=0;j<len/4;j++){
    Serial.print(*value_ptr++);
    Serial.print(", ");
    Serial.println(*value_ptr++);
  }
}

void setup() {
  Serial.begin(115200);
  // open in read mode
  auto cfg = kit.defaultConfig(false);
  cfg.adc_input = AUDIO_HAL_ADC_INPUT_LINE1; // microphone
  cfg.sample_rate = AUDIO_HAL_16K_SAMPLES;
  kit.begin(cfg);
}

void loop() {
  size_t len = kit.read(buffer, BUFFER_SIZE);
  printBuffer(len);
}
Logging
The functionality has a built in logger. The default log level has been set to Warning. You can change it like this:
AUDIOKIT_LOG_LEVEL = Debug; // or Info, Warning, Error
Supported Devices / Processors
The examples have been tested with a AI Thinker v2.2. I do not own any other AudioKit devices, so I can’t guarantee that they work properly. I also made sure that the code is compiling on other processors, but I did not perform any tests. Please note that because I2S is not standardized in Arduino, you need to take care of the I2S initialization and processing yourself on other processors.
Github
The project can be found on Github!


2 Comments
dg · 5. February 2022 at 21:47
Hallo Herr Schatzmann,
ich hatte Sie neulich mal angesprochen, um das AI Thinker Audio Kit mit AC101 zum Laufen zu bringen:
https://www.banggood.com/de/ESP32-Aduio-Kit-WiFi+-bluetooth-Module-ESP32-Serial-to-WiFi-Audio-Development-Board-with-ESP32-A1S-p-1449256.html?rmmds=myorder&cur_warehouse=CN
Sie sagten, Sie unterstützen diese AC101 Version nicht, sondern nur die ES8388 Version.. Ich spiele mit der AC101 Version schon eine Weile herum.
Jetzt mit arduino-audiokit-0.4.0 und Arduino 1.8.19 Version funktioniert das obige Microphone Beispiel und das Microphone-Signal ist im Monitor zu sehen.
Am Board habe ich nichts geändert, es wird so verwendet wie von banggood geliefert (einschl. der Stellung des Dip Switches).
Die Einstellungen in AudioKitSettings.h sehen so aus:
#define AUDIOKIT_BOARD 6
#define AUDIOKIT_USE_WIRE 0
#define AUDIOKIT_SETUP_SD 0 (Ich verwende in einem anderen Beispiel SD_MMC, das funktioniert)
#####################################################################
Ihr Beispiel
#include “BluetoothA2DPSource.h”
#include <math.h>
#define c3_frequency 130.81
BluetoothA2DPSource a2dp_source;
// The supported audio codec in ESP32 A2DP is SBC. SBC audio stream is encoded
// from PCM data normally formatted as 44.1kHz sampling rate, two-channel 16-bit sample data
int32_t get_data_channels(Frame *frame, int32_t channel_len) {
static double m_time = 0.0;
double m_amplitude = 10000.0; // -32,768 to 32,767
double m_deltaTime = 1.0 / 44100.0;
double m_phase = 0.0;
double double_Pi = PI * 2.0;
// fill the channel data
for (int sample = 0; sample < channel_len; ++sample) {
double angle = double_Pi * c3_frequency * m_time + m_phase;
frame[sample].channel1 = m_amplitude * sin(angle);
frame[sample].channel2 = frame[sample].channel1;
m_time += m_deltaTime;
}
return channel_len;
}
void setup() {
a2dp_source.start(“BT_OEH1”, get_data_channels);
}
void loop() {
}
###################################################################
funktioniert ebenfalls, ich höre den Sinus Ton an den BT Kopfhörern.
###################################################################
Nun meine Frage, wie kann man beide Programme zusammen bringen, als input microphone, um am BT Kopfhörer das Microphon-Signal hören zu können?
Hört sich nach technischer Spielerei an, es wäre ein “Verstärker mit Mic Eingang und BT Ausgang.
Es wäre sehr schön, wenn Sie mir weiter helfen könnten.
Gruß aus Berlin
Dietmar Gaffling
pschatzmann · 5. February 2022 at 21:58
Schön zu hören, dass es funktioniert. Ich habe die Unterstützung vom AC101 nachträglich eingebaut, konnte dies aber nicht testen, da ich noch kein solches Board habe.
Zur Frage: Dies solle möglich sein indem man den folgenden Sketch von I2S zum AudioKit anpasst:
https://github.com/pschatzmann/arduino-audio-tools/tree/main/examples/examples-stream/streams-i2s-a2dp